
Story time!
Petit Fours were my thing back in the day (when I was 10). We used to get them from the local grocery store's bakery section. They weren't made by a French pastry chef who was classically trained, and they probably didn't have the highest quality ingredients. But they LOOKED fancy, and that was enough for me. Those little white squares covered in fondant flowers could make any day better.
Flash forward seven years and Amaretto was my thing. As a young, burgeoning New Orleanian coming into my own, I had a brief love affair with Amaretto sours. This love affair ended on a bitter note. I don't miss them. But sometimes they still cross my mind, and I smile.
Flash forward again to present day and ...matcha... might be my new... thing? Matcha is actually totally new to me. I didn't even know what it was a month ago. I noticed it popping up on my blog feed and it seemed like everyone was suddenly super into matcha. I was confused, but intrigued. According to this article, I'm not that late to the game...just, like, 10 centuries or whatever.
Matcha, for those of you who have managed to read this far into the post and not Googled "hey this kid is rambling, can you please just tell me what matcha is" yet, is green tea leaves that have been dried and pulverized. It tastes like green tea, but kind of creamy and there isn't really any bitterness. You don't think the idea of green tea in a pastry sounds good? Quit being so basic. Though, now that matcha is apparently mainstream, maybe matcha is basic? Oh my god, am I basic?! Staying relevant is so so hard, y'all.
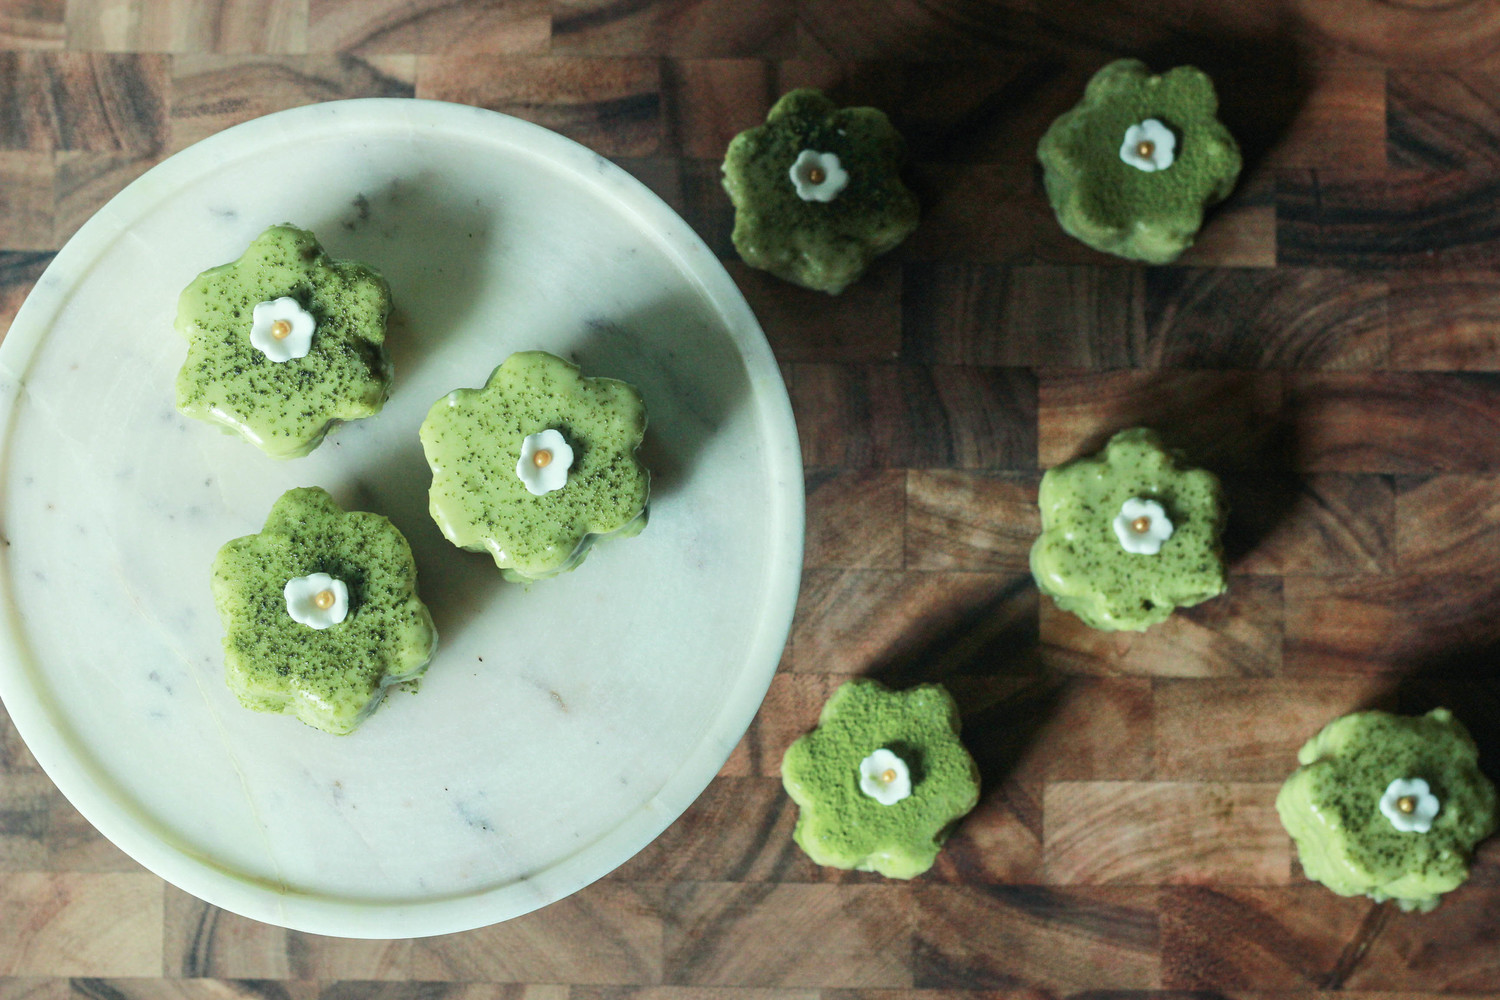
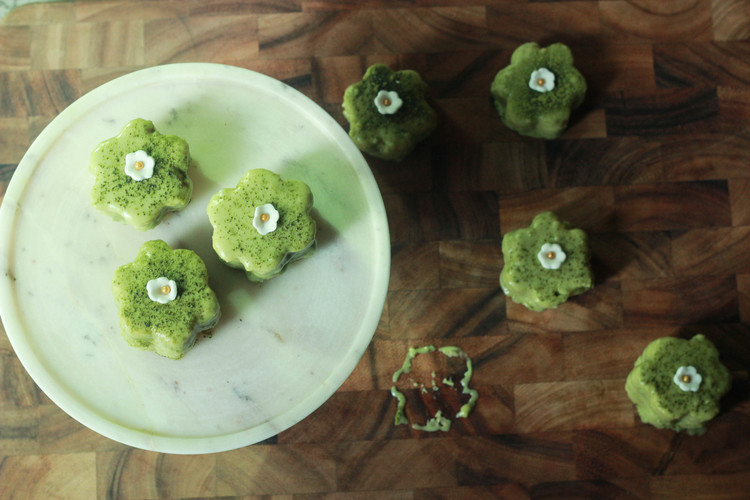
Anywayyy, this week I thought it would be fun to combine all of my loves - old and new - into one sweet little treat. The recipe for the petit four cake base is adapted from here. Check out the video in that link...it's super useful, and that chick is realllllyy into almond extract. I mean, really, look at her eyes light up when she talks about it. I wish I felt that way about something. Unfortunately, I replaced the almond extract with amaretto, because...alcohol. Enjoy, honeys!
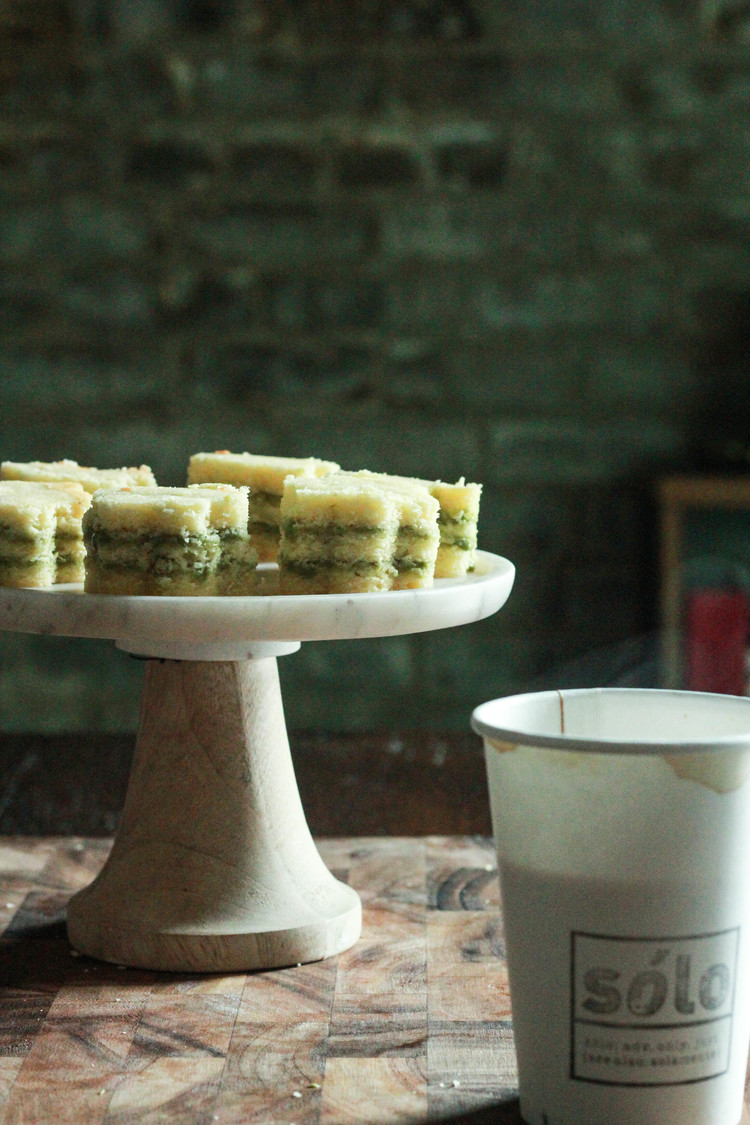

Oh, hi, it's me again (sorry). Notice that coffee cup in the picture above! This weekend I did a little Probably Baking pop-up at Solo Espresso and it was so so so soooo much fun! The owner, Lauren, is such a sweet person and makes incredible coffee! Check out their website here, or read my blurb that I wrote a while back, here!

Cake
WHAT:
- 2 sticks unsalted butter, cut into 1/2" cubes, at room temperature + extra for greasing pans
- 1 pound almond paste
- 1 cup sugar
- 1 teaspoon Amaretto
- 6 large eggs
- 1 cup all-purpose flour
- Pinch fine sea salt
HOW:
- Preheat oven to 375* and grease three 12.5x9" baking sheets.
- Line the baking sheets with parchment paper and grease the tops of the paper. Set aside.
- Using a stand mixer fitted with a paddle attachment, beat together the almond paste and sugar on medium speed until it is well combined. It's going to look kind of rough for a few minutes, but after about 5 minutes it begins to come together.
- Add in the amaretto and beat to combine, about 30 seconds.
- Add the butter, one cube at a time, beating between additions and allowing for each cube to be incorporated into the mixture before adding the next.
- Once all butter has been added, beat on medium speed for about two minutes until light and fluffy.
- Add the eggs, one at a time, beating between each addition.
- Add the flour and salt and beat to combine.
- Evenly spoon the batter into the three prepared pans.
- Use an offset spatula or knife to smooth the batter out.
- Bake for 15 - 20 minutes until cooked through but not brown.
- Allow to cool in the pans before using.
Matcha Filling
WHAT:
- 3 t matcha
- 1 cup powdered sugar
- 3 t meringue powder
- 4 T amaretto
- 1 T buttermilk (you can sub whole milk)
HOW:
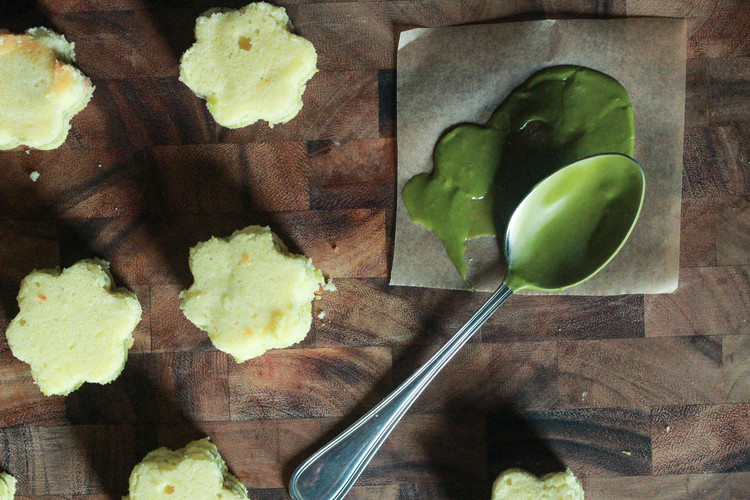
In a medium mixing bowl, whisk together all of the ingredients until it becomes smooth. The texture should be pretty thick, like a paste. You want this to be thick enough to not run off the side of the petit fours when you stack them, but not so thick that you can't spread it. To adjust the thickness, add 1 t powdered sugar (if it's too runny) or 1 t buttermilk (if its too thick) and whisk to combine. Repeat until the mixture has reached the desired texture.
Matcha Glaze
{ingredients are pretty much the same as the filling, but in different proportions}
WHAT:
- 2.5 cups powdered sugar
- 1 t matcha
- 1 T amaretto
- 2 T meringue powder
- 1/3 cup buttermilk (you can sub whole milk here as well)
HOW:
In a medium mixing bowl, whisk together all ingredients until smooth. The result should be about as thick as donut glaze. Again, adjust thickness by adding a teaspoon of powdered sugar or buttermilk at a time to achieve desired consistency.
ASSEMBLY
- Remove cooled cakes from their pans and place on a clean surface, side by side.
- The petit fours will have three layers, so select which cake you want to be the top, middle, and bottom layer. If all the cakes are exactly the same, this step isn't important. However, if they have slight variances, select the sturdiest and thickest layer to be the bottom, the next sturdiest for the middle, and the most fragile layer for the top.
- Once you have selected your layers, spread half of the matcha filling on top of the bottom layer, and half on top of the middle layer. Use a knife or offset spatula to spread it all evenly.
- Place the middle layer evenly on top of the bottom layer, and then place the top layer on top, to create a uniform stack of the three layers.
- Using a cookie cutter or extremely (like, really really extremely realllllly sharp), cut out desired shapes for cake.
- Using two forks or a dipping spoon, dip petit fours one at a time into the glaze, making sure they are evenly coated.
- Allow all excess glaze to drip off and place on a wire rack or parchment paper, and let sit for at least half an hour, until the glaze has hardened slightly.
- Repeat the dipping process to create a second coat. This is optional but it results in a prettier glaze. Let sit for an hour or so before serving. Decorate with fun things!!

______
Check out more amazing recipes from Beau at his website probablythis.com. Follow him on Instagram, Twitter and Facebook for frequent updates on new recipes.